Monday to Saturday - 9:00 am -18:00 pm
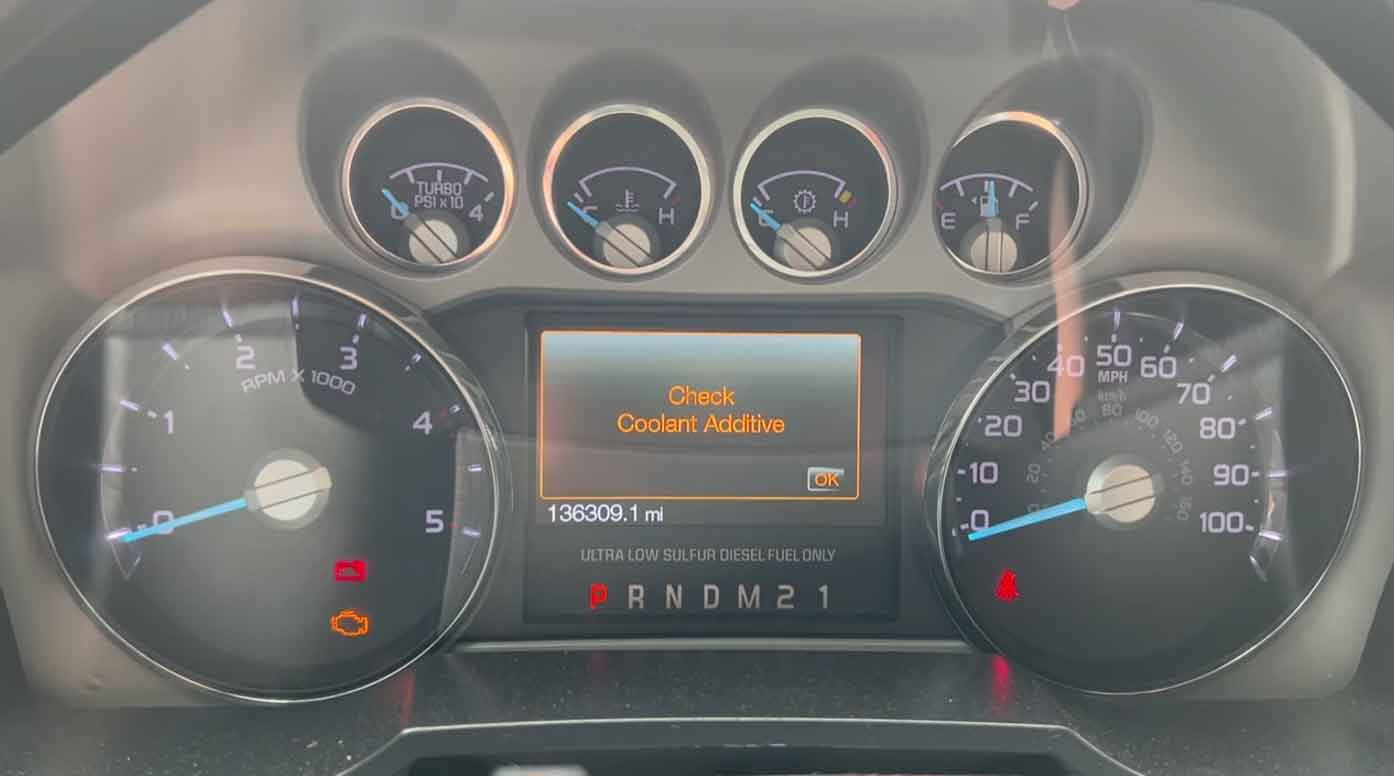
Coolant additives keep your engine protected and running smoothly. These special chemicals prevent rust, stop corrosion, and help your coolant work better. Without proper additives, your cooling system can fail, and that means expensive repairs.
I’ve seen too many engines with clogged radiators and corroded water pumps because owners ignored their coolant additives. In my shop, checking these additives is part of every cooling system service. This guide will show you exactly why it matters and how to check it yourself.
Why Coolant Additives Matter
Coolant isn’t just colored water. It contains important additives that do specific jobs.
These additives stop metal parts from rusting. They prevent corrosion inside your engine block and radiator. They also keep rubber hoses from breaking down.
From years under the hood, I can tell you that old coolant loses its protective power. The additives wear out over time. When that happens, your cooling system starts to fail from the inside.
A weak additive mix can cause:
- Rust buildup in your radiator
- Corrosion holes in your water pump
- Clogged heater cores
- Damaged head gaskets
- Overheating problems
Fresh additives cost much less than a new engine.
Signs Your Additives Need Checking
Your car tells you when coolant additives are failing.
Watch for these warning signs:
The coolant looks rusty or brown instead of bright colored. This means rust is already forming inside.
You see floating particles or sludge in the reservoir. That’s corrosion breaking loose.
Your engine runs hotter than normal. Weak additives don’t transfer heat as well.
The coolant smells like rotten eggs. This happens when additives break down.
Your heater blows cold air in winter. Sludge might be blocking the heater core.
When I service a car with these symptoms, the coolant additive test usually fails.
Step 1: Let Your Engine Cool Down
Safety comes first when working with coolant.
Never open the cooling system on a hot engine. The liquid inside reaches over 200 degrees. Hot coolant can spray out and cause severe burns.
I always tell customers to wait at least three hours after driving. Four hours is even better to be completely safe.
Touch the hood with your hand. If it feels warm at all, wait longer.
The coolant reservoir cap will also feel cool when it’s safe to open.
Step 2: Find Your Coolant Reservoir
The coolant reservoir sits somewhere under your hood.
Look for a plastic tank, usually white or semi-clear. Most have “coolant” or “engine coolant only” printed on the cap.
Common locations include:
- Near the radiator on the driver’s side
- Against the firewall on the passenger side
- Close to the engine on top
Can’t find it? Check your owner’s manual. Every car is different.
In my shop, I keep manuals for common vehicles because reservoir locations vary so much.
Some cars have the reservoir right up front. Others hide it behind other components.
Step 3: Check the Coolant Condition
Now look at your coolant carefully.
The reservoir is usually clear plastic. You can see the liquid inside without opening anything.
Good coolant looks clean and bright. It might be green, orange, pink, or yellow depending on the type.
Bad coolant shows these problems:
Rust color: Brown or muddy looking coolant means rust contamination. The additives have failed.
Cloudy or milky: This could mean oil is leaking into the coolant. That’s a serious problem.
Floating debris: Bits of rust or scale floating around show corrosion inside.
Faded color: When bright green turns pale or clear, the additives are worn out.
From years of experience, I can usually tell if coolant is bad just by looking at it.
Step 4: Test the Additive Strength
Visual checks aren’t enough. You need to test the actual additive strength.
The best tool is a coolant hydrometer or refractometer. These cost about $10 to $30 at auto parts stores.
Here’s how to test properly:
Using a hydrometer:
- Open the reservoir cap slowly
- Squeeze the bulb on the hydrometer
- Insert the tube into the coolant
- Release the bulb to draw liquid up
- Read the floating needle inside
- Check if it’s in the “safe” zone
Using a refractometer:
- Draw a small coolant sample
- Place one drop on the refractometer lens
- Look through the eyepiece
- Read the freeze point temperature
- Good coolant protects to at least -34°F
I keep both tools in my toolbox. The refractometer is more accurate, but the hydrometer works fine for home checks.
Test strips are another option. You dip them in coolant and match the color to a chart. These show pH levels and additive depletion.
When I service a cooling system, I always test before draining. This tells me if the customer has been maintaining it properly.
Step 5: Add Fresh Coolant if Needed
If your coolant level is low or the test shows weak additives, add fresh coolant.
Important: Use the correct coolant type for your vehicle. There are several kinds:
- IAT (green): Older cars, mostly before 2000
- OAT (orange/red): Many newer cars
- HOAT (yellow/orange): European and some Asian cars
- Asian formulas (pink/blue): Specific Asian brands
Never mix different coolant types. They use different additive packages that can react badly together.
Check your owner’s manual or the reservoir cap for the correct type.
Mixing the coolant:
Most coolant comes concentrated. You need to mix it with distilled water.
The standard mixture is 50% coolant and 50% distilled water. Some cold climates need 60/40 for extra freeze protection.
Use a clean measuring cup. Mix them in a separate container first.
Never use tap water. It contains minerals that damage the cooling system.
Adding the mixture:
- Use a funnel to avoid spills
- Pour slowly until reaching the “max” line
- Don’t overfill past the maximum mark
- Replace the cap tightly
- Wipe up any drips immediately
Start your engine and let it run for a few minutes. Check the level again after it’s cool. Sometimes it drops as air bubbles escape.
Still Not Sure About Your Coolant Additives?
Checking coolant additives protects your engine from expensive damage.
Regular checks catch problems early. I recommend testing your coolant every year or every 30,000 miles.
If you see rust, sludge, or get bad test results, flush the entire cooling system. Just adding fresh coolant on top of bad coolant won’t fix the problem.
Not comfortable doing this yourself? Bring your car to a trusted mechanic.
At a professional shop, we have better testing equipment. We can check for exhaust gases in the coolant (sign of a bad head gasket). We also have the tools to flush the system completely.
Good coolant maintenance costs very little compared to engine repairs. I’ve seen $50 coolant flushes prevent $3,000 head gasket jobs.
Take care of your cooling system, and it will take care of you.
Want to learn more about vehicle maintenance? Browse our other guides on car care and preventive maintenance. We update them regularly with real-world advice from working mechanics.