Monday to Saturday - 9:00 am -18:00 pm
Your car’s PCV valve might be small, but it does big work. This little component keeps your engine breathing properly. When it fails, your vehicle can develop serious problems.
The Positive Crankcase Ventilation valve controls harmful gases inside your engine. It sends these gases back through the intake system. There, they burn off cleanly. This process protects your engine oil and keeps everything running smoothly.
But here’s the thing. PCV valves don’t last forever. They can get blocked with gunk. Sometimes they stick open or closed. When this happens, your engine suffers.
In my years working as a mechanic, I’ve seen countless engines damaged by bad PCV valves. The good news? Testing this valve is simple. Anyone can do it at home. You don’t need fancy equipment or special training.
This guide shows you exactly how to check your PCV valve. I’ll walk you through three proven testing methods. You’ll learn what tools you need. And I’ll explain when it’s time to replace the valve.
Let’s get your engine breathing right again.
Why Testing Your PCV Valve Matters
Most drivers ignore their PCV valve until problems start. That’s a mistake. From my experience in the shop, a failing PCV valve causes predictable issues.
Let me explain what happens when this valve goes bad.
Higher Fuel Bills
A stuck-open PCV valve creates a lean condition. Your engine gets too much air and not enough fuel. The computer tries to compensate by injecting more gas. Your fuel economy drops fast. I’ve seen customers lose 2-3 MPG from this issue alone.
Dirty Engine Oil
When the PCV valve clogs up, pressure builds in the crankcase. Combustion gases can’t escape properly. These gases mix with your oil. The oil turns to sludge faster than normal. I’ve opened engines where thick black gunk covered everything. All because of one bad valve.
Engine Running Problems
A malfunctioning PCV valve messes up your air-fuel mixture. Your engine might idle rough at stoplights. It could stall when you try to accelerate. These symptoms get worse over time. Don’t ignore them.
Regular PCV valve checks prevent these headaches. Checking takes just 10 minutes. It can save you from expensive repairs down the road.
Warning Signs Your PCV Valve Is Failing
Your car talks to you through symptoms. Learn to recognize these common signs of PCV valve failure.
Engine Runs Rough at Idle The engine shakes or vibrates more than usual when stopped.
Weird Hissing Sounds You hear air whistling or hissing from under the hood.
Check Engine Light Comes On The computer detects airflow problems and triggers the warning light.
Engine Misfires One or more cylinders don’t fire properly during acceleration.
Oil Leaks Appear You spot oil drips under your car or around valve covers.
Spark Plugs Get Fouled Your spark plugs turn black and oily between changes.
Car Uses More Oil You need to add oil more often than your manual recommends.
Sluggish Performance The car feels slow or hesitant when you press the gas pedal.
When I service vehicles showing two or more of these signs, the PCV valve is usually the culprit. Don’t wait for all these symptoms to appear. Test the valve as soon as you notice anything unusual.
Tools You’ll Need for Testing
One reason I love this job is its simplicity. You don’t need a full toolbox. Here’s what I keep handy for PCV valve testing:
Basic Hand Tools
- Flathead screwdriver (for prying off engine covers)
- Socket wrench set (8mm to 14mm covers most valves)
- Needle-nose pliers (to remove hose clamps)
Replacement Parts
- New PCV valve (buy the correct part number for your vehicle)
- Fresh hose clamps (if the old ones are rusted)
Optional Testing Equipment
- Vacuum gauge (gives you precise readings)
- Shop rag (things can get oily)
- Flashlight (for seeing in tight spaces)
Most of these items are in your garage already. The vacuum gauge is optional. You can test the valve perfectly well without one.
A replacement valve costs between $10 and $30 at auto parts stores. That’s cheap insurance for your engine.
Three Methods to Test Your PCV Valve
I’ll teach you three different testing approaches. Start with the easiest method first. Move to the others if you need more confirmation.
Method 1: Visual Check and Shake Test
This is how I start every PCV valve diagnosis. It’s quick and tells you a lot.
Step 1: Find the Valve
The PCV valve location varies by vehicle. Look near your engine’s valve cover. You’ll see a small cylinder connected to a rubber hose. This hose runs to your intake manifold.
Common locations include:
- On top of the valve cover
- Near the throttle body
- Connected to the air intake tube
Check your owner’s manual if you’re stuck. The valve is usually easy to spot once you know where to look.
Step 2: Remove the Valve
Grab the valve firmly. Twist it gently while pulling. Most valves simply pop out of their rubber grommet. Some are threaded and need a socket wrench to unscrew.
Disconnect the hose using your pliers. Loosen the clamp first. Then slide the hose off.
Don’t worry if the valve looks dirty. That’s normal. Carbon buildup on the outside doesn’t mean it’s bad.
Step 3: The Shake Test
Hold the valve near your ear. Give it a good shake. Listen carefully.
Good Valve Sound: You hear a distinct rattle. The internal plunger moves freely. It clicks against the valve body. This metallic sound means the valve works.
Bad Valve Sound: Complete silence. No rattle at all. The plunger is stuck. This valve needs replacement immediately.
I’ve tested hundreds of PCV valves this way. The shake test is surprisingly accurate. A valve that rattles is usually functioning properly.
Method 2: Suction Test (Engine Running)
This method checks if the valve actually creates vacuum. It’s my go-to test when the shake test passes but I still suspect problems.
Important Safety Note: Your engine will be hot. Be careful not to burn yourself on metal parts.
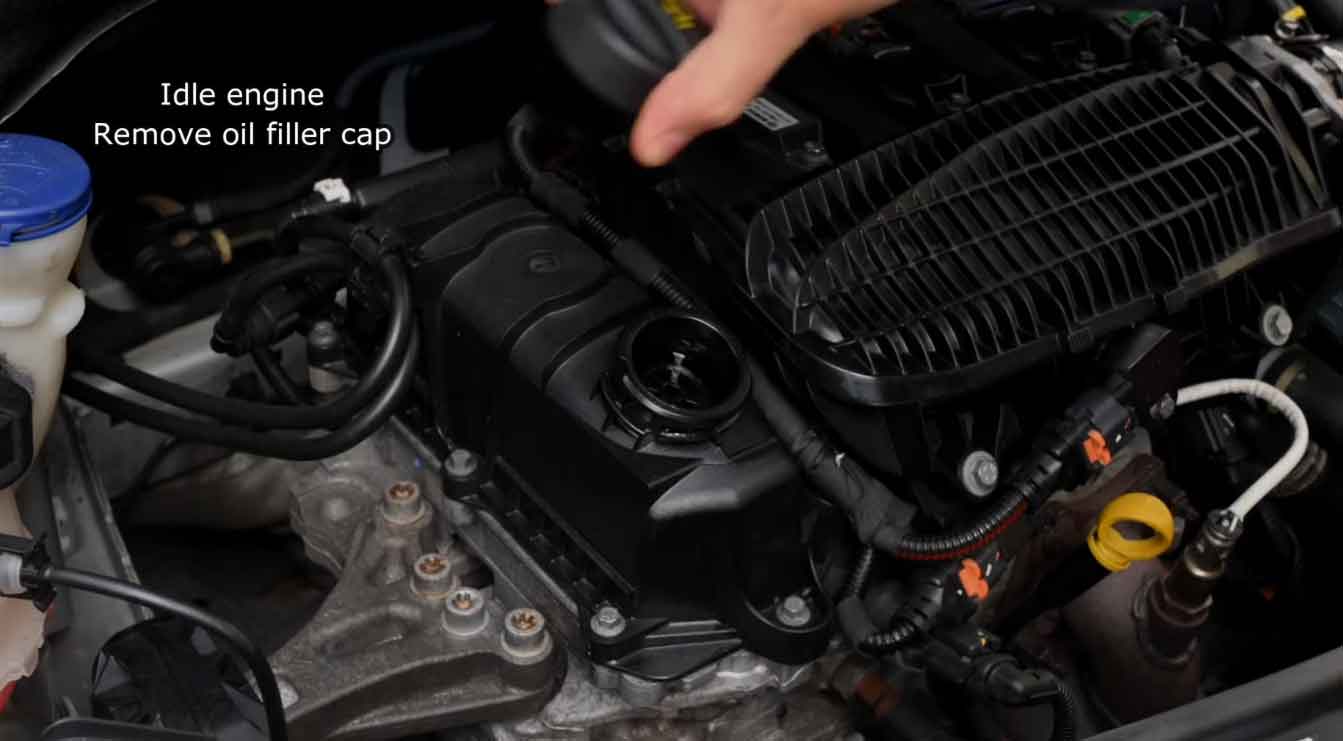
Step 1: Start Your Engine
Let the car idle for 3-4 minutes. The engine needs to reach normal operating temperature.
Step 2: Locate the PCV Valve
Keep the engine running. Find the valve on the valve cover. You’ll remove it while it’s connected to the hose.
Step 3: Pull Out the Valve
Carefully pull the valve from its grommet. Leave the hose attached. The valve should remain connected to the intake manifold.
Step 4: Test for Suction
Place your thumb firmly over the valve opening. Cover it completely.
What You Should Feel: Strong, steady suction pulling on your thumb. The vacuum should be obvious. You might hear the engine idle change slightly.
Problem Signs:
- Weak or no suction at all
- Air pushing out instead of sucking in
- Suction that comes and goes randomly
If suction feels weak, the valve or hose is clogged. If you feel pressure pushing out, the valve is stuck open. Either condition requires replacement.
From years under the hood, I can tell you this test rarely lies. Good suction means a healthy PCV system.
Method 3: Vacuum Gauge Test (Most Accurate)
This is the professional diagnostic method. I use it when dealing with tricky driveability issues. It gives you exact numbers.
Step 1: Connect the Gauge
You have two options for gauge placement:
- Connect directly to the PCV valve using an adapter
- Connect to a vacuum port on the intake manifold
Follow your gauge’s instructions for proper hookup.
Step 2: Check the Reading
Start the engine. Let it idle normally. Watch the gauge needle.
Healthy Reading: The gauge shows steady vacuum between 18-22 inches of mercury (inHg). The needle stays relatively stable. Minor fluctuations are normal.
Problem Readings:
- Below 18 inHg: Valve is clogged or system has leaks
- Above 22 inHg: Uncommon but could indicate stuck valve
- Needle bounces wildly: Severe blockage or valve malfunction
- Zero vacuum: Complete system failure
When I service European cars especially, I always use a vacuum gauge. These vehicles have stricter emission standards. The readings need to be spot-on.
This test also helps diagnose PCV hose problems. A clogged hose shows the same symptoms as a bad valve.
How to Replace a Bad PCV Valve
Found a faulty valve? Replacement is straightforward. I can swap one in about 15-20 minutes. Here’s the exact process I follow in my shop.
Step 1: Get the Right Replacement
Never buy a universal PCV valve. Always match your vehicle’s exact part number. The auto parts store clerk can look this up using your VIN.
Different engines need different flow rates. Using the wrong valve causes the same problems you’re trying to fix.
Step 2: Access the Valve
Some engines have plastic covers hiding the valve. Remove these covers first. Usually 2-4 bolts hold them in place. Use your socket wrench.
Set the covers aside carefully. Don’t lose any bolts or clips.
Step 3: Disconnect Everything
Use your pliers to loosen the hose clamp. Squeeze the tabs and slide the clamp down the hose. Pull the hose off the valve gently. Some wiggling might be needed.
If the valve is threaded into the valve cover, use your socket wrench. Turn counterclockwise to unscrew it.
Push-in type valves simply pull straight out. Grab firmly and wiggle while pulling.
Step 4: Clean the Area
Before installing the new valve, wipe the grommet area clean. Remove any oil or dirt buildup. A clean surface ensures a good seal.
Check the rubber grommet. If it’s cracked or hard, replace it. New grommets cost just a few dollars.
Step 5: Install the New Valve
Push-in valves: Line up the valve with the hole. Push straight down until it seats fully. You should feel it click into place.
Threaded valves: Thread it in by hand first. Then snug it down with your wrench. Don’t overtighten. You’ll crack the valve cover. Just make it firm.
Step 6: Reconnect the Hose
Slide the hose onto the valve nipple. Push it on completely. Reposition the hose clamp over the connection. Squeeze it tight with your pliers.
Tug on the hose to make sure it’s secure. It shouldn’t come off easily.
Step 7: Replace Engine Covers
Put any covers back in their original positions. Tighten the bolts in a crisscross pattern. This prevents warping.
Final Inspection
Start your engine. Listen carefully for any hissing or whistling sounds. These indicate a vacuum leak.
Let the car idle for 5 minutes. Check around the valve for oil leaks. Everything should stay dry.
Rev the engine a few times. The idle should be smooth and steady.
If everything looks and sounds good, you’re done. Take a test drive to confirm the repair solved your symptoms.
Common Mistakes to Avoid
In my shop, I’ve seen DIYers make the same errors repeatedly. Learn from their mistakes.
Using the Wrong Valve Always get the exact replacement for your vehicle. Generic valves cause more problems than they solve.
Overtightening the Valve Hand-tight plus a quarter turn is enough. Gorilla-tight cracks valve covers. Repairs then cost hundreds instead of dollars.
Ignoring the Hose Check the PCV hose condition while you’re there. Cracked hoses cause the same symptoms as bad valves. Replace any hose that feels hard or shows cracks.
Forgetting to Test Always verify the new valve works before closing everything up. Do the suction test with the engine running.
Mixing Up Hose Connections Some engines have multiple vacuum hoses. Take a photo before disconnecting anything. Reference it during reassembly.
Maintenance Tips from a Professional Mechanic
Want to extend your PCV valve life? Follow these practices I recommend to all my customers.
Check It Regularly Inspect the PCV valve every oil change. A quick shake test takes 30 seconds. Catch problems early before they damage your engine.
Use Quality Oil Cheap oil breaks down faster. It creates more sludge. This clogs the PCV system quicker. Stick with your manufacturer’s recommended oil grade.
Change Oil on Schedule Extended oil change intervals stress the PCV system. Old oil produces more vapors and contaminants. Follow your maintenance schedule strictly.
Watch for Symptoms Don’t ignore warning signs. Rough idle or increased oil consumption needs immediate attention. Small problems become big repairs if ignored.
Replace Preventively PCV valves are cheap. If yours is over 50,000 miles old, consider replacing it. Prevention beats repair every time.
Frequently Asked Questions
How often should I replace my PCV valve? Most manufacturers recommend replacement every 30,000-50,000 miles. Some last 100,000 miles. Test it annually regardless of mileage.
Can I drive with a bad PCV valve? You can, but you shouldn’t. A failing valve damages your engine over time. Oil gets contaminated. Seals deteriorate. Fix it promptly.
Will a bad PCV valve cause the check engine light? Yes. A stuck valve creates vacuum leaks. The engine computer detects improper airflow. This triggers codes like P0171 or P0174.
Can I clean a PCV valve instead of replacing it? Sometimes. Soak it in carburetor cleaner overnight. Rinse and let dry. Shake test it again. If it rattles freely, it might work. But replacement is safer and costs so little.
How much does professional PCV valve replacement cost? Expect $75-$150 at most shops. That includes parts and labor. Some dealers charge more. DIY costs just $10-$30 for the valve.
Final Thoughts
Testing a PCV valve isn’t complicated. You don’t need advanced mechanical skills. The three methods I’ve shown you work on virtually any vehicle.
Start with the simple shake test. Move to the suction test if needed. Use a vacuum gauge for precise diagnosis.
When you find a bad valve, replace it immediately. Don’t delay. The $20 part protects your thousand-dollar engine.
I’ve rebuilt too many engines destroyed by ignored PCV valves. The sludge buildup is incredible. Oil passages get completely blocked. Bearings fail. All preventable with a $20 part.
Check your PCV valve twice a year. Test it during oil changes. Replace it at the first sign of failure.
Your engine will thank you with years of reliable service.
Keep your tools ready. Stay on top of maintenance. And remember—small parts matter just as much as big ones.
About the Author: This guide comes from real-world experience diagnosing and repairing thousands of vehicles. Regular maintenance prevents expensive repairs. Take care of the small things, and your car will take care of you.